So you have read the title of this post and are are thinking to yourself, WTF? why would anyone do this?!?!? or if you are an unconventional human, a tight ass and enjoy making eyes role at GSS then read on.
Disclaimer: This is on a whole other level of LOL, unsupported… if you run critical Production through it I guess you also enjoy Russian roulette and swimming in piranha infested waters with open wounds….. So if you follow my instructions you do so at your own risk!
Why you ask?
Let’s say you need to link 2 sites temporarily and don’t really have the server / network equipment to do this on one site…
or…
You need to build a “branch in a box” as a portable solution for a pop up site…. because below happened…

If so, search no further!! this could be the Christmas miracle you have been waiting for!
Let’s get started!
Start off by installing VMware Workstation or Fusion, make sure to configure a bridged Network interface for the ESG


Let’s park Workstation for now and come back to it later.
Fire up vCenter, if you don’t already have a dummy Standard vSwitch or vDS PG, create one which you can attach the new ESG’s uplink to and perform the required configuration without risking or impacting any VM’s on an existing vLan.
When that is done navigate over to Networking and Security

Deploy a new ESG which you intend to run in workstation later, there are lot’s of blog posts out there on how to deploy a ESG so I am not going step by step but will have screenshots of the important bits and bobs later.


Now that you have the ESG deployed with at least 1 Uplink you will need to configure DNS for the ESG itself, this is to ensure that the VPN can perform domain name resolution to lookup the remote address (Dynamic DNS in my case)
Again I don’t want to reinvent the wheel so check out this post here explaining how to set DNS by using postman. (why VMware why??)
Head over to configure, make sure the uplink setup is correct.

Go to Firewall and configure as desired, in this case the default rule is to “Accept” everything.

If you want the edge to function as a DHCP server make sure to set it up here, in my case a DHCP server already exists at the site and it’s just a matter of changing some scope options.
Add the required SNAT rule so that any devices which need to use the ESG as a gateway can still access the internet..

Don’t forget to configure a default gateway for the ESG under “Routing”

Now lets add a new IPsec VPN, no need to reinvent the wheel… there is another good blog post over here showing the process to create the IPSec Site to Site VPN…. so follow the instructions from Let’s v4Real
Here are the screenshots from my setup for good measure.


So in the end it should look something like this.

Now because I actually have a secondary internet connection I am able to test the connectivity between the 2 ESG’s thanks to my Netgear Nighthawk M1 MR1100 4GX Gigabit LTE Mobile Router
The ethernet port of this router is connected to a switch with a trunk port related to the vDS PG called “MIFI” + the laptop running VMware Workstation is also connected to a Trunk port on that network segment…. so this means I can test the connectivity / setup before exporting the ESG to Workstation and taking it to the remote site.
So I head over to the ESG for the primary site and I can see the tunnels are up!

So now that the tunnels are up I perform a little ping test to the laptop connected the 192.168.15.0/24 network and confirm it’s working, latency is a little high as this is running over 4G with low signal but it works!

So the next step is to copy the ESG we just created / setup from the source vCenter.
Start off by shutting it down.

I won’t go into how to export a VM from vCenter, there are may ways to skin a cat… In my case I just copied and zipped the ESG VM directly from the NFS share it was deployed on. Why would I do this and not clone it etc… because I am lazy and it was just easier solution in my lab…
Make sure not to delete or remove the original ESG from NSX manager / vCenter, if you ever want or need to change a configuration and redeploy it again it’s ready to go… (the ESG is so small it doesn’t take up much space in terms of storage…)
Now because I used vDS PG, I need to remove the reference from the .vmx file so that VMware Workstation does not have a wobbly / error that vDS is unsupported… blah blah.

In workstation, right click on My Computer, click on “Scan for Virtual Machines”, point it at the folder containing the ESG VM.

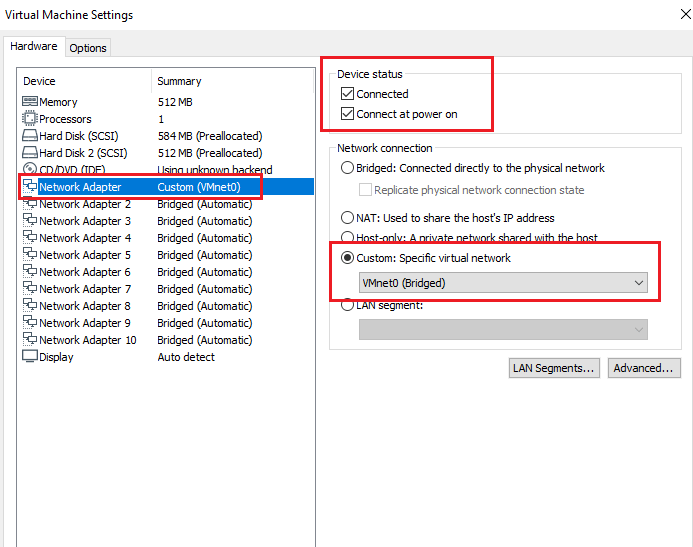
Once the VM is imported, make sure to configure the network interface.
Power on the ESG and cross your fingers

When the ESG boots you can then login and run the command show service ipsec to check the tunnel status. (don’t forget to open up connectivity to the ESG, port forward / allow 4500 and 450 UDP on your firewall / router)

So let’s say you want this thing to auto start, you have 2 options…
Using “Shared VM’s” and “Auto Start-up” see KB here

Or the another option which is the one I am using is to create a scheduled task in windows:
Command is below, run it with highest privileges and as “SYSTEM” user, set it to run at “system start up”
c:\...VMwareWSpath\vmrun start "C:\VMs\NSX-EDGE\STUDIO-EDGE.vmx" noguiAnd there you go, just like magic you have a Site to Site VPN solution that would make any normal person cringe.
PS: If the VPN drops and doesn’t reconnect, just soft restart the ESG and it should automatically reconnect.
Here is little photo of my Frankenstein NSX edge.

I hope this was helpful, partially educational or at least mildly entertaining.
vMAN
Recent Comments